
I love shiplap in everyone’s home & I wanted to incorporate it into my kitchen!! So I added it to both sides of my L shaped counter, which I call the island 🤪. I have 4 counter stools on the long side & I thought it needed more character- but very simple🤗
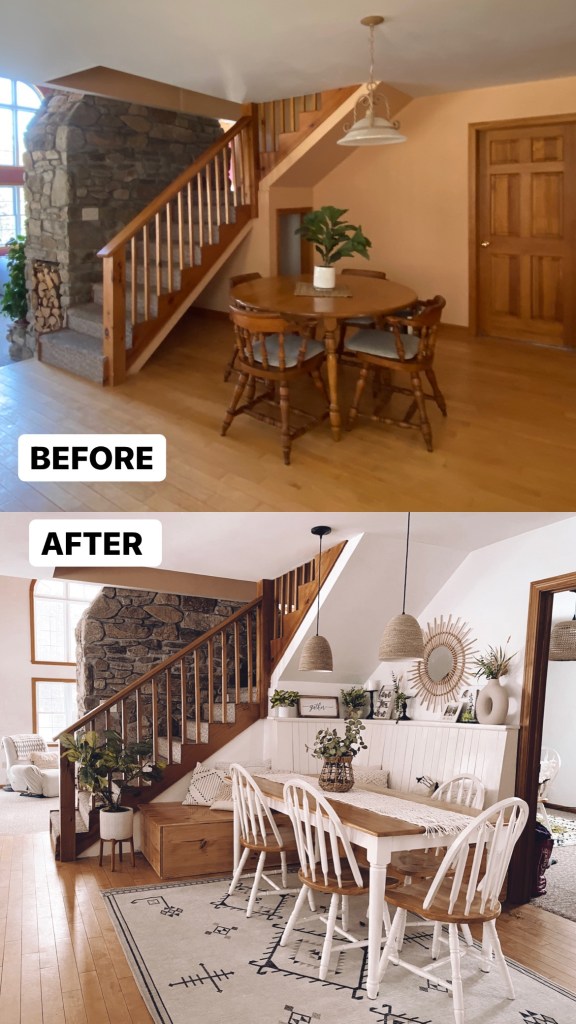
Here is the before & after!


It gives it a simple look with slight texture & hopefully it adds a little extra inches to the view of the “height” in the kitchen.
So, on the long end with the stools— I tried to do budget friendly DIY shiplap- I used the table saw and cut down a sheet of bead board. I cut the shiplap boards into 4inches wide strips. I primed/painted the backside. I already had the board so that was free. I planned to use tile spacers that I had bought for the subway tile backsplash . But when I started laying the boards up, it was clear that my table sawing skills were not exceptional. The boards weren’t very straight. So I just eyeballed the gaps. From afar it looks great, but close up you can tell the gaps aren’t exactly identical.
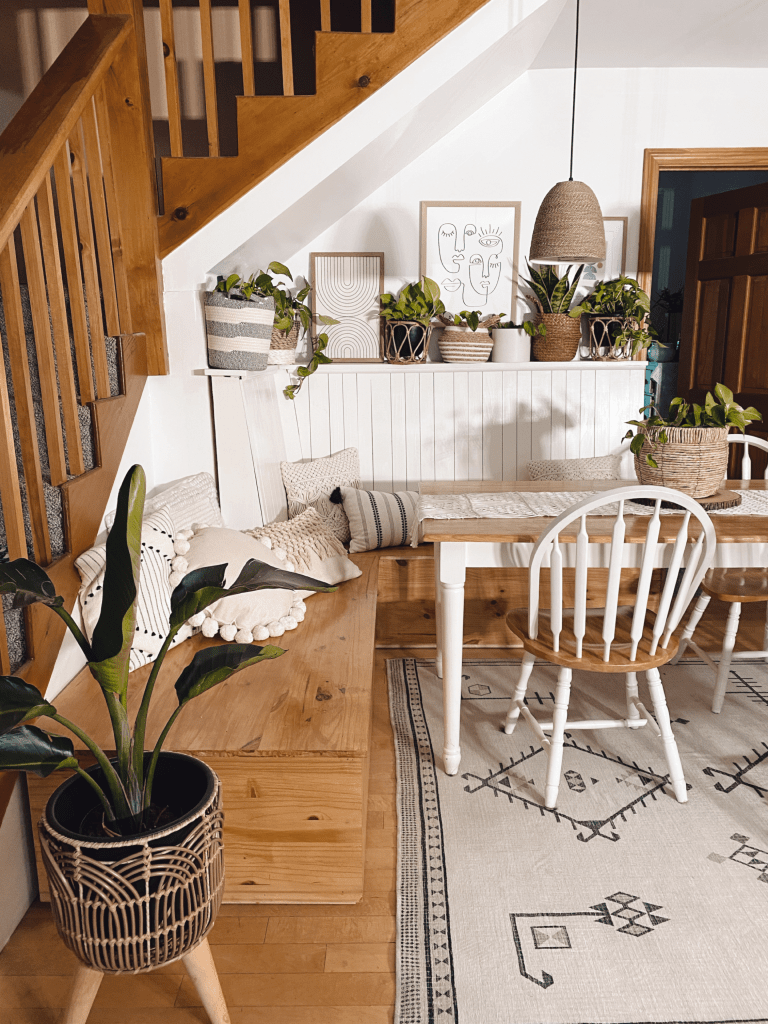
Thankfully, I chose to start behind the stools, so by the time I got to the side you can see the most- I decided to buy precut boards that I have already used! For the breakfast nook bench!
I bought 3 inch wide by 1/2 thick x 36 long .
Steps!!!
1- measure from floor to counter
2- measure boards and mark on either side of board with marker
3- cut boards to size with miter saw
4- prime / paint front & two sides
5- put up in place to visualize and make sure all fit
6- use brad nailer (ours is an air compressor version)
7- fill nail holes with putty
8- sand putty flush when dry
9- repaint— Sherman Williams Snowbound in satin!!!😍👏🏻


Here is the breakfast nook example😍 (this project is from February 2021)

I love the way both of the shiplap projects turned out!! It’s a quick and easy DIY! Let me know if you give it a shot in your home!!!
Thanks!!
Lauren ✌🏻🛠💓
